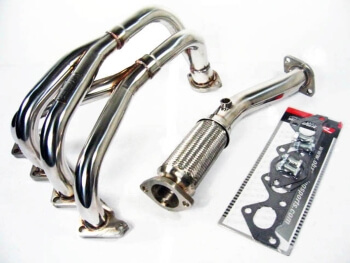
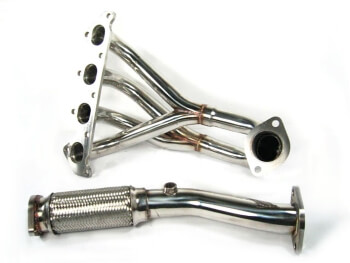
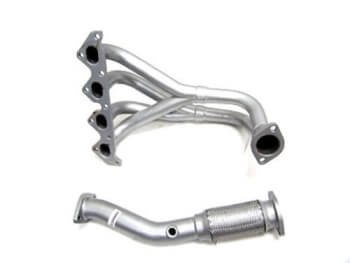
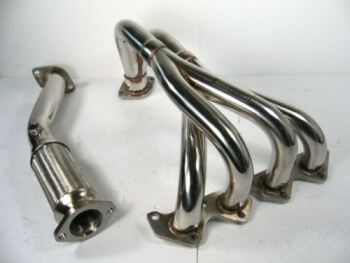
1997-2001 Hyundai Tiburon Elantra 2.0L OBX Exhaust Header
Price list
Still could not find the Part? Contact us @ Find Exact Part in 24 Hours
Specification
| Brand | |
|---|---|
| MPN | 10-1701-197S |
| Year | 1997, 1998, 1999, 2000, 2001 |
| Make | |
| Model | Elantra, Tiburon |
| Trim | Coupe 2-Door, Sedan 4-Door, Wagon 5-Door |
| Engine | 1.8L 1796CC l4 GAS DOHC Naturally Aspirated, 2.0L 1975CC l4 GAS DOHC Naturally Aspirated |
| Placement on Vehicle | Front |
| Fitment Type | Direct Replacement |
| Surface Finish | Ceramic |
| Collector ( Piping ) | 1.9" ID |
| Primary Tube | 1.6" OD |
| Flange Thickness | 0.4" |
| Runner Wall | 16 Gauge |
| Warranty | Yes |
| Part Number | 10-1701-197C; H.IE002C, 10-1701-197S, H95002S, HIEJJ2S |
| Condition | New |
Fit In Five Steps
How to replace a Hyundai Tiburon Elantra 2.0L Exhaust Header?
1.Secure the Vehicle
Safety comes first. Disconnect the battery. Let your vehicle cool down completely before wrenching. Once the heat’s gone, jack up the vehicle and secure it with jack stands and wheel chocks. Your owner’s manual should tell you where your jack points are Crawl or creep under the car and disconnect the header pipes from your exhaust manifolds. If you don’t want your exhaust to hang, bring a box with you to prop it up.
2.Prepare Tools
While you’re still under the car, take a look to make sure there are no components blocking the exhaust manifold or connected from below. Climb out from under your vehicle and head for the engine compartment to disconnect all sensors and tubes from the exhaust manifold. Unbolt the manifold from your engine block, noting which bolt came from which location. You might have to spray the bolts with a penetrating fluid to cut through any accumulated crud or corrosion. If you’re reusing the factory bolts, make sure they aren’t stripped, that the tread is true and that they’re in good condition.
3.Remove the Exhaust Header
Once the bolts are out, lower the manifold down through the engine compartment. With the manifold out, remove the gasket from around the exhaust port flange. Give the flange surface a thorough cleaning and install the new gasket. Now comes the fun part: sliding the headers into position. Depending on the shape, you might be able to guide it in from above. More likely than not, you’ll have to slip it in the same way the manifold came out—from below. This is usually the point where you call a buddy for a second set of hands. Remove old Exhaust Header Pipe using required tools.
4.Replace the New Exhaust Header
After it’s in position, loosely bolt the headers into place—keeping them loose lets you wiggle the headers around if things aren’t all lining up. Pulling the header away from the engine block can help lend clearance to start the bolts. As soon as it’s aligned and all the bolts are threaded, tighten them down and then torque them to the specs noted in the installation instructions. When torquing, be sure to start with the center bolts and work outwards in a spiral pattern. Next, reconnect all the sensors and tubes that you disconnected in Step 4. Install the new exhaust header attached to the manifold.
5.Replace all Removed Parts
Crawl back under your vehicle and bolt your exhaust system to your new headers and make sure everything is secure underneath. Safely jack the vehicle down. Climb in, fire it up and wake the neighbors. Your new headers are roaring to go, but keep an eye out for exhaust leaks around the connection points—and speed traps around town. Reconnect all removed parts according to a reversed procedure. Reconnect the battery and test drive the vehicle.


$221.63


Got something to discuss?