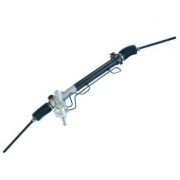
15826677 | 2004-2013 Hummer GMC Chevrolet Ignition Cylinder & Door Locks Set
Price list
Still could not find the Part? Contact us @ Find Exact Part in 24 Hours
Specification
| Brand | |
|---|---|
| MPN | 15826677 |
| Year | 2004, 2005, 2006, 2007, 2008, 2009, 2010, 2011, 2012, 2013 |
| Make | |
| Model | Canyon, Colorado, H3 |
| Trim | All |
| Engine | All |
| Placement on Vehicle | Front, Rear |
| Fitment Type | Direct Replacement |
| Surface Finish | Black & Chrome |
| Warranty | Yes |
| Part Number | 10392385, 15826677, 19121155, 89022338, 89022365, 89022371, 89022372, D-24-123 & D-24-122 |
| Condition | New |
Fit In Five Steps
How to replace a Hummer GMC Chevrolet Ignition Cylinder & Door Locks Set?
1.Materials Needed & Location
- Boxed end wrench or ratchet sets
- Flashlight or drop light
- Regular size flat blade and Phillips head screwdriver
- Replacement ignition lock cylinder
- Safety equipment (safety glasses)
- Small flat blade screwdriver
Locate the vehicle’s battery and disconnect the positive and negative battery cables before proceeding. There are usually three or four bolts that are located on the sides and bottom of the steering column that needs to be removed in order to access the ignition lock cylinder. Locate the plastic covers that hide these bolts. Using a small, flat blade screwdriver, remove the plastic covers and set them aside. Note the size and style of the bolts and use the appropriate tool to remove the bolts. In some cases, they will be Phillips head screws or standard/metric sized bolts that will require a socket and ratchet for correct removal.
2.Removal of Bolts
Once the bolts have been removed, you should be able to remove the steering column covers. This becomes easier if you unlock the steering wheel with the adjustable arm located underneath or to the left of the steering column, so you can move the steering wheel up and down to loosen the column covers. After the covers have been removed, you should be able to locate the ignition lock cylinder. On most vehicles, there is a plastic or metal clip that is over the ignition lock cylinder. To remove this, remove the small screw that holds this cover in place, typically located on the bottom of the switch. Once the screw has been removed, carefully slide the cover off the ignition lock cylinder.
3.Remove Old Ignition Lock Cylinder Switch Assembly
The process for removing the lock cylinder will vary based on the individual manufacturer. In most cases, this process will require you to insert the key and turn it to the first setting which unlocks the steering wheel. While you do this, use a flat blade screwdriver to press a small metal push pin that is located underneath the ignition lock cylinder. Depressing this switch will unlock the cylinder from the housing. After you’ve pressed the button and unlocked the ignition lock cylinder from the lock body, the ignition lock cylinder will be ready to remove. With the key still inserted, gently remove the ignition lock cylinder from the lock body. You should see two screws that are located on the top of the lock body after you’ve removed the ignition lock cylinder. Loosen these screws about four full turns.
5.Replace New Ignition Lock Cylinder Switch Assembly
In most cases, installing the new ignition lock cylinder is very simple. However, you should refer to your vehicle’s service manual to find out anything particular to your vehicle. For example, on some vehicles, you have to press down on the bottom spring of the ignition lock cylinder so it does not bind up inside the lock housing. Tighten the two screws on top of the lock cylinder. After the new ignition lock cylinder is secure inside the housing, tighten the two screws on top of the lock body.
5.Reinstall all Reomal Parts & Check for Drive
Reinstall the ignition lock cover and tighten the screw underneath. Put the steering column covers back into place. Before you reconnect the battery, make sure your new ignition lock cylinder moves to all four positions with the new key. Test this function three to five times to verify the repair was completed correctly. Reattach the positive and negative terminals to the battery. Clear error codes with the scanner.

$104.95


Got something to discuss?