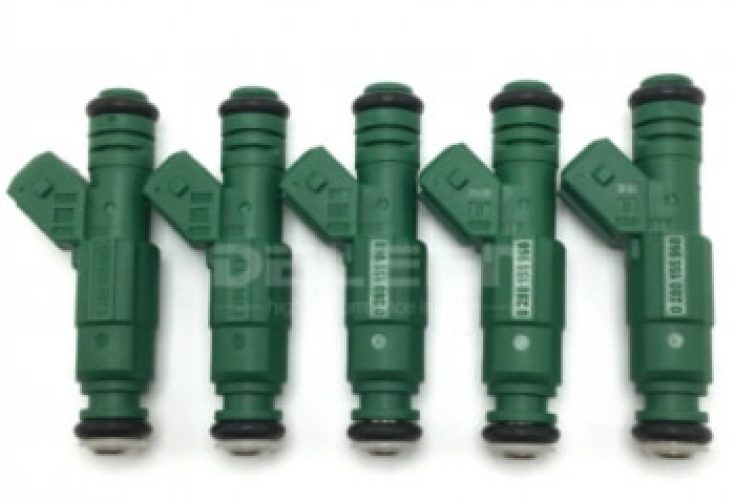
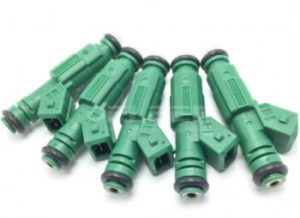
2001-2010 Volvo S40 S60 V50 5 Pieces Green Giant Fuel Injector Nozzles 42 lb/hr 440cc
Price list
Still could not find the Part? Contact us @ Find Exact Part in 24 Hours
Specification
| Brand | |
|---|---|
| MPN | 0280155968, 9202100 |
| Year | 2001, 2002, 2003, 2004, 2005, 2006, 2007, 2008, 2009, 2010 |
| Make | |
| Model | S40, S60, V50 |
| Trim | Sedan 4-Door, Wagon 4-Door |
| Engine | 2.4L 2435CC l5 GAS DOHC Naturally Aspirated, 2.4L 2435CC 149Cu. In. l5 GAS DOHC Naturally Aspirated, 2.5L 2521CC l5 GAS DOHC Turbocharged, 2.5L 2521CC 154Cu. In. l5 GAS DOHC Turbocharged, 2.0L 1984CC 121Cu. In. l5 GAS DOHC Turbocharged, 2.3L 2319CC l5 GAS DOHC Turbocharged |
| Placement On Vehicle | Front-Left, Right |
| Fitment Type | Direct Replacement |
| Coil Resistance | 12 Ohms, High Impedance |
| O-ring/Seal Material | Viton |
| Static Flow Rate | 42 lb/hr = 440 cc/min @ 43.5PSI |
| Connector Type | Multi-Port |
| Gain / Offset | 0.12ms/MG, 0.055ms |
| Warranty | 1 Year |
| Part Number | Bosch-0280155968, Volvo-9202100, 0280155968 EV6 Body, M-9593-M39 0280156127 0280150558 FJ878 9202100, 4G1622 238959 M736 155-0452 8 Cylinder SOHC DOHC |
| Condition | New |
Fit In Five Steps
How to replace a Volvo S40 S60 V50 Fuel Injector Nozzle?
1.Verifying the Condition Of the Fuel Injector Condition
Start the engine. Check the dash for any engine lights and listen to the engine operation for any cylinders not firing correctly. Feel for any vibrations during engine operation. Shut the engine off and open the hood. Check for any wiring that may be broken or damaged by the injectors.
2.Locate the Fuel Injector
Park your vehicle on a flat, hard surface. Make sure that the transmission is in a park (for automatics) or in 1st gear (for manuals). Place wheel chocks around the rear tires. In this case, the wheel chocks go around the front tires since the rear of the vehicle will be lifted up. Engage the parking brake to the lock the rear tires from moving. Install a nine-volt battery saver into your cigarette lighter. This will keep your computer live and keep your setting current in the vehicle. Open the vehicle’s hood to disconnect your battery.
3.Remove the Old Fuel Injector
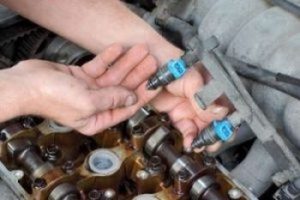
Remove the air cleaner element from the top of the throttle body. Remove the harness from the injectors.Unscrew the mounting bolts to the injector retainer bracket and remove the bracket. Pull out the injectors from the throttle body. Clean the throttle body with a non-abrasive cleaner and wipe out the injector body housing with a lint-free cloth. Remove the engine cover it there is on top of the engine. Using a quick disconnect tool, disconnect the fuel rail from the fuel lines. Unscrew the mounting bolts that secure the fuel rail onto the engine. Remove the rail from the injectors. Using a small pry bar, lightly pry up on the injectors and pop them out of the intake ports.
4.Replacing the New Fuel Injector
Install new o-rings onto the new injectors. Place the injectors into the intake ports and slightly push them down into place. Install the fuel rail onto the injectors. Screw in the mounting bolts all the way down to hand tight and turn additional 1/8 turn to secure the bolts. Snap the fuel rail and fuel line connections together. Install the engine cover and snap into place.
5.Checking For Leaks & Test Drive the Vehicle
Reconnect the ground cable back to the battery’s negative post. Remove the nine-volt battery saver from the cigarette lighter. Tighten the battery clamp up tight. Ensure that the connection is good. Listen for the fuel pump to activate and turn off the ignition after the fuel pump stops making noise. Use a combustible gas detector. Check all of the connections for any leaks and sniff the air for any fuel odors. Pull out the jack and put it aside. Remove the wheel chocks and Test drive the vehicle.

$99.70





Got something to discuss?