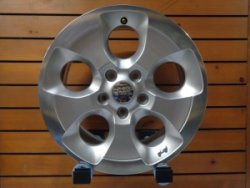
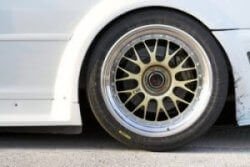
9119 | 2011-2013 Jeep Wrangler 18×7.5″ Silver Alloy Wheel Rim
Price list
Still could not find the Part? Contact us @ Find Exact Part in 24 Hours
Specification
| Brand | |
|---|---|
| Year | 2011, 2012, 2013 |
| Make | |
| Model | Wrangler |
| Trim | 2-door Convertible, 2-door Suv, 4-door convertible, 4-door Suv |
| Engine | 2.8L VM Motori RA 428 Diesel I4, 3.6L Pentastar V6, 3.8 L EGH V6 |
| Placement on Vehicle | Front or Rear |
| Fitment Type | Direct Replacement |
| Material | Aluminum Alloy |
| Color | Machined Chrome Silver |
| Rim Diameter | 18" |
| Rim Width | 7.5" |
| Number of Bolts | 5 |
| Warranty | Yes |
| Part Number | 9119 |
| Condition | Used |
Fit In Five Steps
How to replace a Jeep Wrangler 18×7.5″ Silver Alloy Wheel Rim?
1.Secure the Vehicle
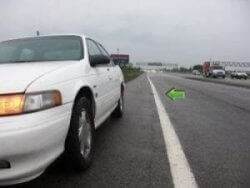
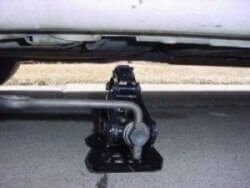
Apply the parking brake and put the car in “Park” position. Find a flat, stable and safe place to change your tire. Never change a tire on an incline or hill; always seek a flat surface, even if it means driving on a flat tire. Use bricks, wooden wedges, or metal wheel chocks to block the wheels at the opposite end of the car from the end that is to be raised. Lift the wheel off the ground by placing a jack under the car near the tire. Force the arm of the jack-up and down until the tire is lifted off the ground.
2.Pry off the Wheel Cover and Loosen the Lug Nut
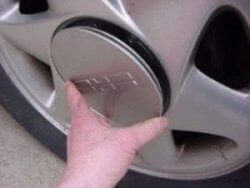
You can use a screwdriver to pry the wheel cover off. Just insert the point of the tool where the edge of the cover meets the wheel, and apply a little leverage. The Hubcap should pop off. You may have to do this in a couple of places as if you were prying the lid off a can of paint. Apply all your weight to the bar on the left. This starts turning the nut counterclockwise, which loosens it. Don‘t remove the lug nuts completely; just get them loose enough to remove by hand after you jack up the vehicle. A hollow pipe and a cross-shaft wrench can loosen the tightest lug nuts. Remove the lug nuts from the rim with a lug wrench. Then pull the tire and rim off the hub. Deflate the tire. To deflate, push the pressure needle down on the valve stem. The valve stem protrudes from the tire and is where you connect with an air hose to add air to the tire.
3. Remove the Wheel Rim
Remove the stem cap and push down the small metal stem inside. You will hear air being released from the tire. Wedge a flat-head screwdriver in different spots between the tire and rim to break the seal between them. Lift the spare onto the lug bolts. Slip the tire lever or pry bar between the rim and the tire and push the lever outward to separate the rim from the tire. You may need to slip the lever in several spots around the circumference between the rim and the tire to fully separate the two. You can also ask someone to stand on top of the wheel and use the rim as leverage to pry the tire from around it. Pull the old rim from the tire.
4. Place the New Wheel Rim
Give each lug nut a jolt with the wrench to get it firmly into place, but wait until the car is on the ground before you really try to tighten the lug nuts. Place the new tire on the hup. Place the deflated tire around the new rim. Fill the tire with enough air to secure the rim within the tire circumference. There should be no gap between the inner tire and rim.
5.Rearrange All Parts & Jackoff Vehicle
Give each lug nut a jolt with the wrench to get it firmly into place, but wait until the car is on the ground before you really try to tighten the lug nuts. After the vehicle is resting on the ground, use the lug wrench to tighten the lug nuts as much as you can. Replace the wheel cover or hubcap. Repeat this process to change other rims.

$55.00




Got something to discuss?