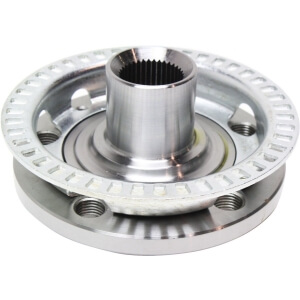
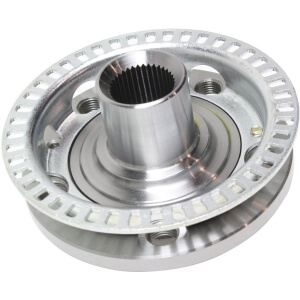
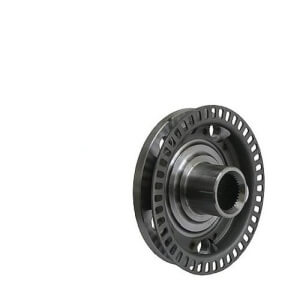
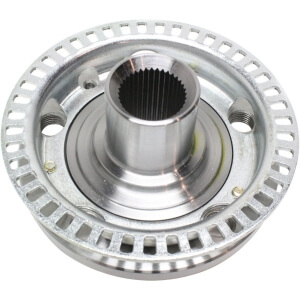
1J0407613G | 1998-2007 Volkswagen Beetle Golf Jetta & Audi TT Quattro Wheel Hub Assembly
Price list
Still could not find the Part? Contact us @ Find Exact Part in 24 Hours
Specification
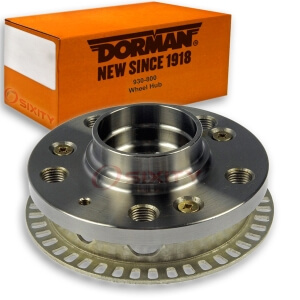
| Brand | Dorman, Drivestar, Keystone Automotive Operations, Perfect Fit Group, SKF |
|---|---|
| MPN | 1J0407613G, 930-800 |
| Year | 1998, 1999, 2000, 2001, 2002, 2003, 2004, 2005, 2006, 2007 |
| Make | |
| Model | Beetle, Golf, Jetta, TT Quattro |
| Trim | Convertible 2-Door, Coupe 2-Door, Hatchback 2-Door, Hatchback 4-Door, Sedan 4-Door, Wagon 4-door |
| Engine | 1.8l 1781cc L4 Gas Dohc Turbocharged, 1.9L 1896CC 116Cu. In. l4 DIESEL SOHC Turbocharged, 2.0L 1984CC 121Cu. In. l4 GAS DOHC Naturally Aspirated, 2.5l 2480cc 151cu. In. L5 Gas Dohc Naturally Aspirated, 3.2L 3189CC 195Cu. In. V6 GAS DOHC Naturally Aspirated |
| Placement on Vehicle | Front, Rear |
| Fitment Type | Direct Replacement |
| Surface Finish | Polished, Rust Protected |
| Bolt Pattern | 5 x 3.94 in |
| Warranty | Lifetime |
| Part Number | 101113L; 485423; 780-0228, 1J0 407 613 G, 1J0 498 625, 1J0 598 477, 1J0407613G, 1J0498625, 1J0598477, 930-800, LT1J0407613G |
| Condition | New |
Fit In Five Steps
How to replace a Volkswagen Beetle Golf Jetta & Audi TT Quattro Wheel Hub Assembly?
1.Park Your Vehicle on a Flat Surface
As with most types of auto maintenance, you’ll want to take all necessary precautions when changing your vehicle’s wheel bearings to ensure your safety. The worst thing that can happen when changing your wheel bearings is for your vehicle to suddenly shift or roll away. Before you begin, park your vehicle on a level surface.
Put the vehicle in park (or, for manuals, 1st, reverse, or neutral) and be sure to put the parking brake up. For added stability, it can be smart to use sturdy chocks to hold your vehicle’s wheels in place. Obviously, you’ll want to use chocks on the wheels you don’t plan on modifying, as the wheels you do modify will be elevated off the ground. For example, you would place wheel chocks behind the rear tires if you are fixing a front wheel bearing and behind the front tires if you are working on a rear wheel.
2.Loosen the Lug Nuts and Lift the Wheel Using a Jack
For proper access to the internal components of the wheel whose bearings you’re replacing, you’ll need to elevate the wheel. Luckily, most vehicles come with a jack for just this purpose. Before you lift the wheel, however, you may want to slightly loosen the lug nuts with a tire iron, as breaking their initial resistance is harder without the ground holding the wheel steady. After this, carefully lift your wheel.
If your vehicle doesn’t come with a jack, you may need to buy a suitable jack at an auto supply store. The lug nuts, which you should have already loosened, should come off easily. Remove these and put them in a safe place where you won’t lose them. Next, remove the wheel itself. It should come freely. Some like to keep track of the lugnuts by removing the hubcap, turning it over, and using it as a sort of “plate” to contain them.
3.Remove the Brake Caliper & Remove the Dust Cover, Cotter Pin, and Castle Nut
Using a socket and a ratchet, remove the caliper’s bolts. Then, remove the caliper itself using a screwdriver. In the center of the vehicle’s exposed rotor should be a small metal or plastic cap called the dust cover which protects the components holding the rotor in place. Since you’ll need to remove the rotor, the cap and the components it protects will have to go.
Usually, the dust cover can be removed by gripping it with calipers and tapping the calipers with a hammer. Inside, you’ll find the castle nut, usually secured with a cotter pin. Remove the cotter pin with pliers or wire cutters, then unscrew the castle nut and remove it (and its washer).
4. Remove the Rotor & Disassemble the Hub Assembly
Place your thumb securely on the peg in the middle of the rotor assembly. Firmly (but somewhat gently) bump the rotor itself with the palm of your other hand. The wheel’s outer bearing should loosen or fall out. Remove the outer bearing. Finally, remove the rotor itself. The wheel bearing is inside the hub, which is usually held in place with several bolts that screw in from behind. These bolts can be tricky to reach because they’re tucked away in the undercarriage, so you may want to use a skinny socket wrench and/or a breaker bar to loosen and remove them. When you’ve removed the bolts, take the hub off of the axle.
To gain access to the bearings, you’ll need to take apart the hub. You’ll probably need to use a wrench (and/or a hammer) to remove the end of the hub and any anti-lock brake wheel that may be part of your hub. Then, you may need to use a specialized “puller” tool to remove the central bolt. The bearing assembly should come apart easily. Removing the bearing assembly’s races usually means physically breaking them with a grinder or hammer and chisel. Because of this, you’ll want to have replacement races ready. After removing the races, it’s a good idea to clean the inside of the bearing assembly around the knuckle.
5.Install New Races and New Wheel Bearings & Replace All Parts in Reverse Order
Set new races in place in the bearing assembly with a few taps from a hammer. Finally, grease a new inner bearing and install it in the assembly. Ensure the bearings are properly aligned, that they’re pushed in as far as they can go and that any sealing rings are flush with the outside of the assembly. Now that you’ve changed the bearings, basically all that’s left to do is to re-build your vehicle’s wheel. Don’t forget, however, that this means installing a new outer bearing after the rotor is in place.
Put the hub assembly back together and install it on the axle shaft. Put the rotor back on and secure it in place with its bolts. Install a new, well-greased outer bearing at this point. Lightly tighten the castle nut and secure it in place with a new cotter pin. Replace the dust cap. Put the caliper and brake pads back in place and secure them with the appropriate bolts. Finally, put the tire back in place and secure it with lug nuts.


$23.11


Got something to discuss?