
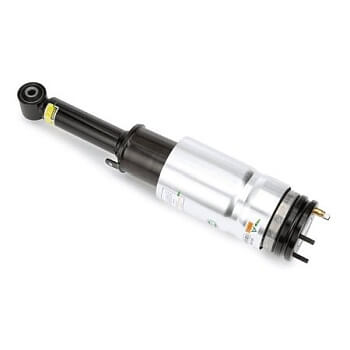
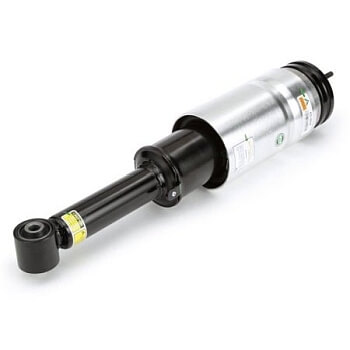
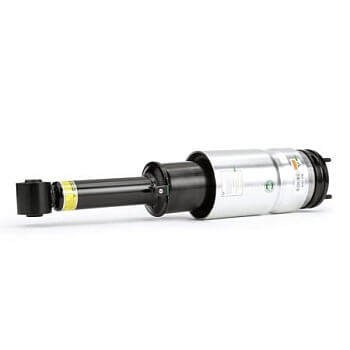
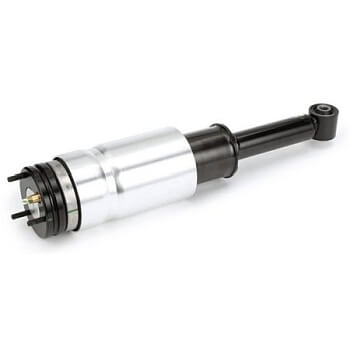
2005-2009 Land Rover Front OEM Rebuild Suspension Air Spring Bag Strut
Price list
Still could not find the Part? Contact us @ Find Exact Part in 24 Hours
Specification
| Brand | |
|---|---|
| MPN | LRD3-R306-ADFU, AS-2809 |
| Year | 2005, 2006, 2007, 2008, 2009 |
| Make | |
| Model | LR3, Range Rover Sport |
| Trim | Sport Utility 4-Door |
| Engine | 4.4L 4394CC V8 GAS DOHC Naturally Aspirated, 4.2L 4196CC V8 GAS DOHC Supercharged, 4.4L 4394CC V8 GAS DOHC Naturally Aspirated, 4.0L 4009CC 245Cu. In. V6 GAS SOHC Naturally Aspirated |
| Placement on Vehicle | Front-Right, Left |
| Fitment Type | Direct Replacement |
| Warranty | Lifetime |
| Part Number | LRD3-R306-ADFU, AS-2809, LRD3-R306-ADFP, RNB501620, RNB501600, RNB501470, RNB000857, RNB000856, RNB501600, RNB501580, RNB501250, RNB501620, RNB501460, RNB501580, RNB501480, RNB501470, RNB501460, RNB501250, RNB000858, RNB000857, RNB000856, AS-2809 |
| Condition | New, Refurbished |
Fit in Five Steps
How to replace a Land Rover air spring bag strut?
1.Locate the Strut & Spring Assembly
The struts are cylinder-shaped pistons filled with hydraulic fluid, usually shaped a bit like a metallic road cone with a spring wrapped around it. Open the hood and locate the strut bolts, usually a circle of three bolts on a pan in the engine compartment, to each side of the car, near the windshield. In the center of the ring of bolts will be the bolt for the strut pan itself. Don’t lose any of these bolts yet, especially not the center bolt, but use this to guide you to your working spot.
2.Remove the Wheel & Brake Line Support
First, loosen the bolts securing the wheel with a lug wrench and lift the car with a jack, positioning the jack according to the Owner’s Manual instructions for changing a tire. Once the car is raised, position a jack stand under the car for stability. Remove the bolts that secure the wheel and remove the wheel. It’s always important to use jack stands to secure the car. Do not attempt to do this job only supporting the car on the jack. Jacks can shift suddenly, dropping the car and possibly trapping you under it. Car jacks use the hydraulic power that can fail suddenly and need to be backed up by jack stands to do the job safely. Invest in a couple of jack stands. You might need to remove the brake line support bracket from the strut assembly. This isn’t a feature on all cars, so disregard this step if you don’t see a small bracket holding the brake line to the strut. If you do, unscrew the bracket with the appropriate size socket wrench and move the brake line up and out of the way so you can remove the strut. Also called the stabilizer or the anti-roll bar, the sway bar works along with the strut assembly to stabilize the car during bumps and irregular road conditions. To do this, you need to remove the mounting bracket with a socket wrench and rotate the sway bar out of the way. Look for a small metal bracket attaching a metal bar (usually black) to the strut and remove it. Again, this won’t always be an obstacle on all cars; you might just need to loosen the strut from the steering knuckle and free it. Once you’ve gotten these obstacles out of the way, you’re ready to remove the old strut.
3.Removing the Old Strut & Spring Assembly
Remove the bolts from the steering knuckle. There are most likely two or three large bolts holding the strut to the steering knuckle. Remove these by removing the nuts from the assembly and loosening the strut. This is often rusted on and difficult to remove. You might choose to spray some rust loosening spray like WD-40 on equal onto the bolts before you can free them. Try hammering a few times on the knuckle itself to loosen things up a bit before hammering directly on the bolts holding the strut to the knuckle. This might take some elbow grease. Depending on the model of your car, you may also need to place your jack under the steering knuckle to raise it slightly and make the bolts visible. Once the strut bolts are out the strut and steering knuckle are separated. Open the hood and locate the strut towers to remove the bolts. Usually, they are located at the midpoint of the inside fender well and look like cylinders. They are most likely held in by three small bolts. Remove the strut tower bolts. Do not remove the center nut or the strut will come apart and it is under high spring tension. Don’t unscrew the center bolt on the top of the strut pan until you’ve compressed the springs if you’re going to. If you’ve got a quick-strut assembly, you can discard the old strut and skip forward to installing your new fully-assembled strut. If you have access to a spring compressor, consider removing the spring.
4.Replace New Strut & Spring Assembly
Put the new strut into the spring. Make sure to include any rubber parts from the old strut. Install the strut bearing over the spring and install the new strut rod nut to the manufacturer specified torque while holding the strut rod to prevent spinning the strut shaft. Install the completed strut assembly back into the steering knuckle. Replace the bolts, leaving them finger tight, allowing the assembly to move freely.Place the strut assembly back into the strut tower and replace the strut tower bolts. Now you can tighten the bolts with your wrench, securing the strut assembly to the steering knuckle and torquing to the manufacturer’s specifications.
5.Retighten Removal Parts & Check For Performance
Tighten the lug bolts finger tight before lowering the car. Jack the vehicle up slightly to remove the load on the jack stands, then remove the jack stands and lower the vehicle to the ground. Tighten the wheel to the proper specifications, as well as the strut tower bolts. Test drive at low speed to evaluate the vehicle safely. Avoid high-speed driving or high-traffic areas. It’s possible that the vehicle may require alignment. Repeat the process for all struts you want to change. It’s cheaper to replace struts on a need-to basis, but they tend to wear out all at once, so you might as well do the rest if you’re willing to invest in two or four new struts. The process will work in the same basic way for struts in all positions.


$184.00
Got something to discuss?