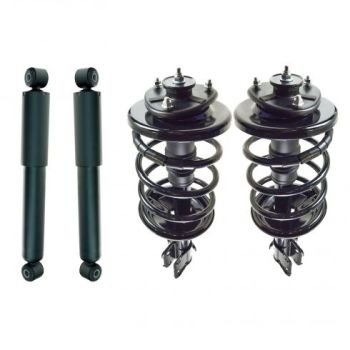
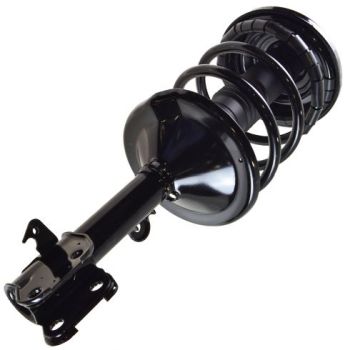
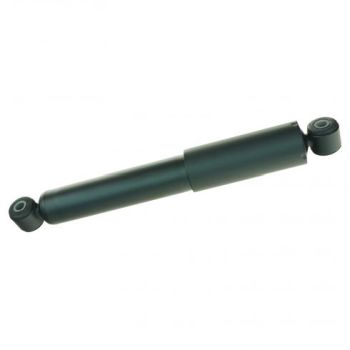
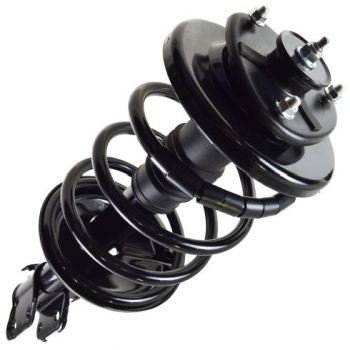
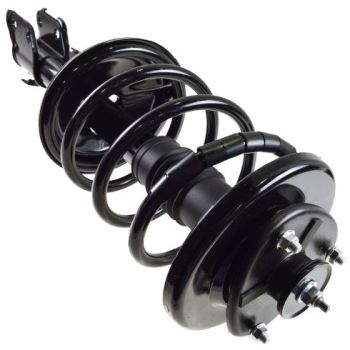
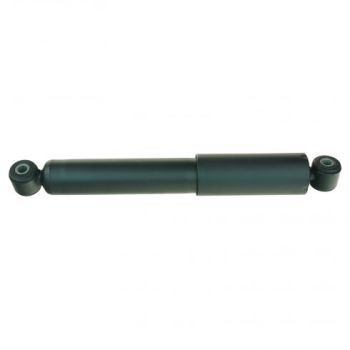
1999-2004 Honda Odyssey Front and Rear Strut Spring & Shock Absorber Kit Set of 4
Price list
Still could not find the Part? Contact us @ Find Exact Part in 24 Hours
Specification
| Brand | |
|---|---|
| MPN | AM-3946127743, 1ASSP00707 |
| Year | 1999, 2000, 2001, 2002, 2003, 2004 |
| Make | |
| Model | Odyssey |
| Trim | Ex / Lx / Ex-l / Cargo – Mini Passenger Van 5-door |
| Engine | 3.5l 3471cc 212cu. In. V6 Gas Sohc Naturally Aspirated / 3.5l 3474cc V6 Gas Sohc Naturally Aspirated |
| Placement on Vehicle | Front, Rear, Left, Right |
| Fitment Type | Direct Replacement |
| Kit or Single Part | Kit |
| Kit Parts Included | Shock Absorber, Strut |
| Warranty | Lifetime |
| Part Number | AM-3946127743, 1ASSP00707, 51601-S0X-A19, 51602-S0X-A19, 51605-S0X-305, 51605-S0X-A05, 51606-S0X-305, 51606-S0X-A05, 52610-S0X-305, 52610-S0X-A04, 51601S0XA19, 51602S0XA19, 51605S0X305, 51605S0XA05, 51606S0X305, 51606S0XA05, 52610S0X305, 52610S0XA04, Monroe 171598,Monroe 171597, Monroe 37218, KYB 344353, KYB SR4072, KYB SR4071 |
| Condition | New |
Fit In Five Steps
How to replace a Honda Odyssey Strut Spring & Shock Absorber?
1.Tools Required for Repair
Basic hand tools are needed for this job:
- Socket wrenches (metric or SAE, depending upon your vehicle)
- Combination wrenches (metric or SAE, depending upon your vehicle)
- Large, flat-bladed screwdriver
- Vise grips (optional, depending upon the type of shock absorber)
- Rust penetrant
- Vehicle jack and jack stands
2.Secure the Vehicle
Jack up the car until one wheel is clear of the ground and support the vehicle with a jack stand. Follow all appropriate safety precautions. Remove the wheel/tire. Once the wheel is removed, locate the lower attachment bolts and nuts of the shock absorber and remove them. If necessary, use the rust penetrant.
3.Prepare for Removal Process of Old Shock Absorber
If the suspension arms drop when the lower bolt is removed, or if you can’t push the bolt out once the nut is removed, you may have to use the jack to take the load off of the lower suspension arm. To do this, you will need to locate your jack at the lower point where the shock absorber attaches to the suspension arm (or the axle). Make sure that the jack is lifting on a solid point on the lower suspension arm or axle. Raise the jack just enough to take the load off the shock or to the point where the shock absorber bolt can be removed. Now tackle the upper attachment point of the shock absorber. If the upper attachment is the threaded end of the shock absorber piston rod, you will most likely notice that this rod rotates as you try to loosen the nut. The trick here is to hold the rod and keep it from rotating while you loosen the nut. There are special sockets available that fit over the oval end of the piston rod, but a pair of vice grips will work just as well. Remember: You’re removing these old shock absorbers, so any damage to the piston rod is unimportant. Once the shock is free at both ends, pull it clear of the vehicle. Sometimes you will have to pull it through a suspension arm to get it free.
4.Place New Shock Absorber
You are now ready to install the new shock absorber, but first, you need to install any washers and rubber cushions that go on the threaded rod. After installing any washers or grommets, remove any plastic strap that is holding the new shock absorber from expanding. Start by reinstalling the shock, attaching the top first. Attach the hardware loosely at first, until you get both ends of the shock absorber in place. Now attach the bottom of the shock absorber. You will most likely have to compress the shock to align the bottom of it with the mounting holes. Gradual pressure will compress the shock; it just takes some time. Note: There is no hard-and-fast rule about top first and bottom second. Experiment to see what works best for your vehicle.
5.Replace all Removal Parts & Check For Test Drive
Once the shock absorber is securely in place, you can tighten the fasteners. When you are tightening the threaded nut down onto the rubber cushions, squeeze the rubber about a quarter of an inch and then stop. Another way to determine how far you should tighten is to apply the same amount of torque (pressure) to the fasteners as was required to remove the old ones. Once the lower hardware has been tightened, you are finished with the first shock absorber. Remount the wheel and lower the vehicle back down. The rest of the shock absorbers should be replaced following the same procedure. When you have installed all the new shock absorbers and secured the wheels and tires, look around your vehicle to ensure that you have not left any debris or tools where they may get run over. Now take the vehicle for a short and slow test drive, listening for any squeaks or bumps that may indicate loose hardware.


$197.15


Got something to discuss?