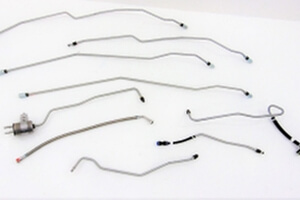
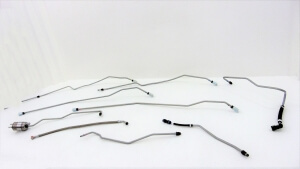
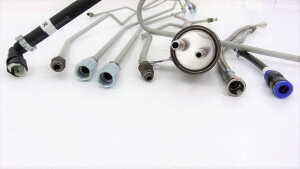
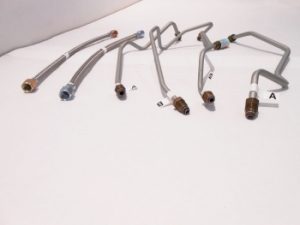
FL255-A | 2005-2008 Chevrolet Pontiac Saturn Complete Fuel Line Set
Price list
Still could not find the Part? Contact us @ Find Exact Part in 24 Hours
Specification
| Brand | |
|---|---|
| Year | 2005, 2006, 2007, 2008 |
| Make | |
| Model | Cobalt, G5, Ion, Pursuit |
| Trim | Coupe 2-Door, Coupe 4-Door, Sedan 4-Door |
| Engine | 2.0L 1998CC 122Cu. In. l4 GAS DOHC Turbocharged, 2.2L 2198CC 134Cu. In. l4 GAS DOHC Naturally Aspirated, 2.4L 145Cu. In. l4 GAS DOHC Naturally Aspirated |
| Placement on Vehicle | Front |
| Fitment Type | Direct Replacement |
| Material | Stainless Steel |
| Warranty | 1 Year |
| Part Number | FL255-A |
| Condition | New |
Fit In Five Steps
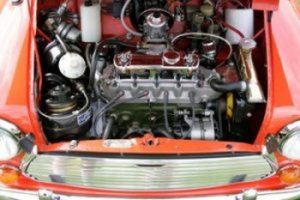
How to replace a Chevrolet GMC Fuel Line?
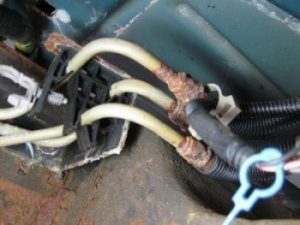
1.Verifying the Condition Of the Fuel Hose
Using a flashlight and a combustible gas detector, check for any leaking fuel in the engine compartment. Also, check for any fuel leaking on the supply, return, or vapor hoses.
2.Tools Required & Secure Vehicle
Materials Needed
- Allen wrench set
- Boxed end wrenches
- Breaker bar
- Drip pan
- Flashlight
- Flathead screwdriver
- Floor Jack
- Fuel hose quick disconnect kit
- Fuel resistant gloves
- Fuel transfer tank with pump
- Jack stands
- Needle nose pliers
- Protective clothing
- Ratchet with metric and standard sockets
- Safety glasses
- Torque wrench
- Torque bit set
- Transmission Jack
- Wheel Chocks
Make sure that the transmission is in a park (for automatics) or in 1st gear (for manuals). Place wheel chocks around tires. In this case, the wheel chocks will be around the front tires since the rear of the vehicle will be lifted up. Engage the parking brake to the lock the rear tires from moving. Using a floor jack, lift under the vehicle at its specified jacking points until the wheels are completely off the ground. The jack stands should go to the jacking point locations, and then lower the vehicle onto the jack stands. For most modern cars, the jacking points for jack stands will be on the pinch weld just under the doors along the bottom of the car. Install a nine-volt battery saver into your cigarette lighter. Open the vehicle’s hood to disconnect your battery. Take the ground cable off of the battery’s negative post disabling the power to the ignition system and fuel system.
3.Removing the Fuel Hose(Fuel Line)
On vehicles 1996 to today with a fuel hose in the engine compartment:
Locate the fuel hose that is damaged or leaking. Use a fuel hose quick disconnect tool to remove the fuel hose from the fuel rail. Use a fuel hose quick disconnect tool and remove the fuel hose from the fuel line behind the engine along the firewall.
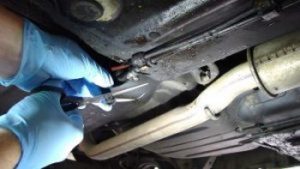
On vehicles 1996 to today with a fuel hose under the vehicle:
Remove the fuel hose from the fuel line. Use a fuel hose quick disconnect tool and remove the fuel hose from the fuel line behind the engine along the firewall. Go under the vehicle and remove fuel plastic line from the vehicle. This line may be held up by rubber grommets. Use a quick disconnect tool and remove the fuel line from the fuel filter. If the vehicle does not have an inline fuel filter, you can then skip this step. Get a transmission jack or similar jack. Place the jack in the fuel tank. Remove the fuel tank straps.Remove the mounting bolts to the fuel filler neck. Use a quick disconnect tool to remove the fuel line from the fuel pump. Place a drip pan under the fuel tank and remove the fuel hose from the fuel pump.
4.Installing the New Fuel Hose(Fuel Line)
Materials Needed
- Allen wrench set
- Boxed end wrenches
- Flashlight
- Flathead screwdriver
- Fuel transfer tank with pump
- Needle nose pliers
- Ratchet with metric and standard sockets
- Torque wrench
- Torque bit set
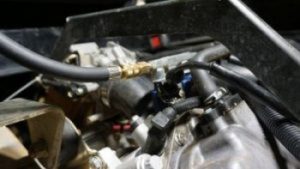
On vehicles from 1996 to today with a fuel hose in the engine compartment:
Snap the quick disconnect together onto the fuel line. This is located by the firewall. Snap the quick disconnect together from the fuel line to the fuel rail. Check both connections to ensure that they are sealed tight. If you had to remove any brackets, be sure to install them.
On vehicles from 1996 to today with a fuel hose underneath:
Snap the quick disconnect together onto the fuel pump. This is located in the fuel tank. If you are installing all three lines, then you will need to install the vapor line to the charcoal canister and the return line to the fuel tank by snapping the quick disconnect together. Raise up the fuel tank. Align the fuel filler neck so it can be mounted. Install the mounting bolts to the fuel filler neck. Open the fuel neck door before you do this and tighten the bolts finger tight and 1/8 turn. Hook up the fuel tank straps. Put thread locker onto the threads of the mounting bolts. Tighten the bolts up hand tight and then 1/8 turn to secure the straps. Snap the quick disconnect on the fuel hose to the fuel line. You’ll find this located behind the firewall in the engine compartment. Be sure to remove the transmission jack.
5.Checking for Leaks & Test Drive the Vehicle
Reconnect the ground cable back to the battery’s negative post. Remove the nine-volt battery saver from the cigarette lighter. Tighten the battery clamp up tight. Ensure that the connection is good. Listen for the fuel pump to activate and turn off the ignition after the fuel pump stops making noise. Use a combustible gas detector and check all of the connections for any leaks. Sniff the air for any fuel odors. Using a floor jack, lift under the vehicle at its specified jacking points until the wheels are completely off the ground. Keep them far away from the vehicle. Pull out the jack and put it aside. Remove the wheel chocks. During the test, go over different bumps allowing the fuel to slosh around inside the fuel lines. Monitor the dash for the fuel level and for any engine light to appear.


$141.04


Got something to discuss?