Specification

Brand

,

MPN

16141182111

Year

1995, 1996, 1997, 1998, 1999, 2000, 2001

Make

Model

740i, 740iL, 750iL

Trim

Base Sedan 4-door

Engine

4.0L 3982CC V8 GAS DOHC Naturally Aspirated, 4.4L 4398CC V8 GAS DOHC Naturally Aspirated, 5.4L 5379CC V12 GAS SOHC Naturally Aspirated

Placement on Vehicle

Front-Left

Fitment Type

Direct Replacement

Material

Plastic

Surface Finish

White

Warranty

2 Year

Part Number

16 14 1 182 111, 16-14-1-182-111, 16141182111, 802 06050 001, 80206050001

Condition

New

Fit In Five Steps

How to replace a BMW 740i 740iL 750iL 5.4L-V12 Fuel Tank Sending Unit?

1.Measure & Determine Sending Unit

First measure tank depth from the top of the tank, near the sending unit, to the bottom. This measurement determines the length of the sending unit’s float arm. Next, trim the kit’s sending unit arm—they usually come in 24in lengths—and match it to the tank depth. A strong pair of wire cutters will work with most units, but some require a hacksaw. Once you have cut the float arm to the correct length, fasten it with set screws to the flange of the new sending unit that will be screwed into the top of the tank.

2.Disconnect Sending Unit & Remove Screws

The sending wire will come off a post in the center of the flange. There may also be a ground wire coming off the second post at the edge of the flange. Both wires lead to the back of the fuel gauge. Turn off the power running to the boat’s systems before you disconnect any wires. Then disconnect both the sending wire and ground wire to the old sending unit. Note that if the gauge is grounded directly to a tab on the tank, there may be no ground wire. Remove the screws that hold the sending unit to the tank and take it out.

3.Remove Old Fuel Sending Unit

Next, remove the three wires on the back of the old gauge. One wire goes to the center pin on the tank sending unit, one goes to ground, and the third connects to a 12-volt source, normally the ignition switch. Remove the fuel gauge.

4.Install New Fuel Sending Unit

Install the new sender by lowering the float and float arm into the tank. Be sure to slide a new gasket into place under the flange, then align the gasket with the holes in the sender and in the tank. When the gasket is aligned, mark it in relation to the flange, as it may turn while you are centering the screw holes to match the tank holes. Mark the screw holes in the tank for easier alignment; the flange will cover them and make them difficult to locate. Check to be sure the float arm can move freely and will not stick in a corner of the tank or against a vertical wall.

5.Reinstall Removal Parts & Check Leakage

Orient the sender unit so the float arm’s movement is not hindered. You can check this ahead of time by holding the sender next to the tank before you install it to see which way the float can move freely. Once you know the proper orientation, duplicate it when you put the unit in the tank. To minimize confusion, use a marker to show the direction of travel of the float arm once the screw holes are aligned. Put in the new screws and tighten them down.

Got something to discuss?


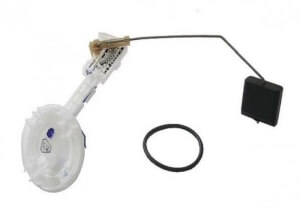
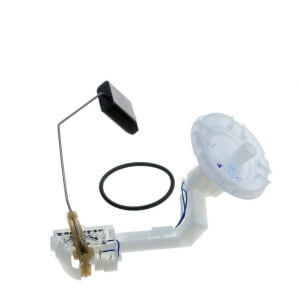
16141182111 | 1995-2001 BMW 740i 740iL 750iL 5.4L-V12 Fuel Tank Sending Unit

$110.10