
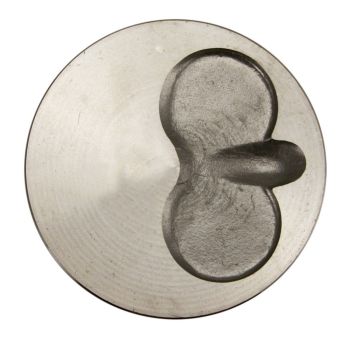
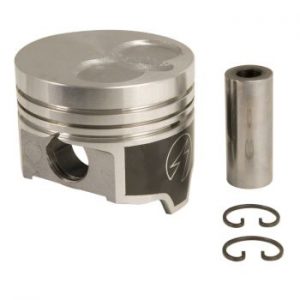
1988-1994 Ford F-Series E-Series 7.3L Diesel Engine Piston
Price list
Still could not find the Part? Contact us @ Find Exact Part in 24 Hours
Specification
| Brand | |
|---|---|
| MPN | 224-2908, 224-2908WR, 144171HA .040, H651CP .040 |
| Year | 1988, 1989, 1990, 1991, 1992, 1993, 1994 |
| Make | |
| Model | E-250 Econoline Club Wagon, E-350 Econoline, E-350 Econoline Club Wagon, F Super Duty, F-250, F-350, F59 |
| Trim | Base Cab & Chassis – Long Conventional 2-Door, Base Cutaway Van 2-Door, Base Extended Cargo Van 2-Door, Base Standard Cargo Van 2-Door, Base Stripped Chassis, Chateau Extended Passenger Van 2-Door, Chateau HD Extended Passenger Van 2-Door, Chateau HD Standard Passenger Van 2-Door, Chateau Standard Passenger Van 2-Door, Custom Cab & Chassis – Long Conventional 2-Door, Custom Cab & Chassis 2-Door, Custom Crew Cab Pickup 4-Door, Custom Cutaway Van 2-Door, Custom Extended Cab Pickup 2-Door, Custom Extended Cargo Van 2-Door, Custom Extended Passenger Van 2-Door, Custom HD Extended Passenger Van 2-Door, Custom HD Standard Passenger Van 2-Door, Custom Standard Cab Pickup 2-Door, Custom Standard Cargo Van 2-Door, Custom Standard Passenger Van 2-Door, Custom Stripped Chassis, Custom Stripped Chassis – Incomplete, XL Cab & Chassis – Long Conventional 2-Door, XL Cab & Chassis 2-Door, XL Crew Cab Pickup 4-Door, XL Cutaway Van 2-Door, XL Extended Cab Pickup 2-Door, XL Extended Cargo Van 2-Door, XL Extended Passenger Van 2-Door, XL HD Extended Passenger Van 2-Door, XL HD Standard Passenger Van 2-Door, XL Standard Cab Pickup 2-Door, XL Standard Cargo Van 2-Door, XL Standard Passenger Van 2-Door, XL Stripped Chassis, XL Stripped Chassis – Incomplete, XLT Cab & Chassis – Long Conventional 2-Door, XLT Crew Cab Pickup 4-Door, XLT Extended Cab Pickup 2-Door, XLT Extended Passenger Van 2-Door, XLT HD Extended Passenger Van 2-Door, XLT HD Standard Passenger Van 2-Door, XLT Lariat Cab & Chassis 2-Door, XLT Lariat Crew Cab Pickup 4-Door, XLT Lariat Extended Cab Pickup 2-Door, XLT Lariat Standard Cab Pickup 2-Door, XLT Standard Cab Pickup 2-Door, XLT Standard Passenger Van 2-Door |
| Engine | 7.3L 445Cu. In. V8 DIESEL OHV Naturally Aspirated |
| Placement on Vehicle | Engine |
| Fitment Type | Direct Replacement |
| Material | Aluminum |
| Pin Diameter (Inch) | 1.11 |
| Bore (Inch) | 4.1100 |
| Country/Region of Manufacture | United States |
| Warranty | 1 Year |
| Part Number | 224-2908, 224-2908WR, 144171HA .040, H651CP .040, 1813154C1, E8TZ6102A, 9-7098D; 144171, 224-2908 |
| Condition | New |
Fit In Five Steps
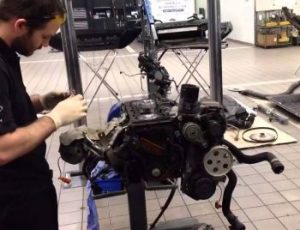
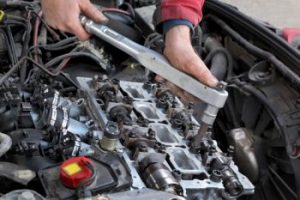
How to replace a Ford F-Series E-Series Diesel Engine Piston?
1.Materials Needed for Repair
- Wrenches
- Sockets
- Torque wrench
- Towel/rags
- Scraper
- Kerosene
- Piston ring tool
- Diesel oil
- Piston rings
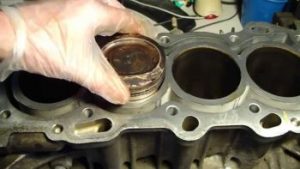
2.Access the Piston
In order to get to the piston rings, you’re going to have to remove the cylinder head. This is an involved process, as you’ll need to disconnect many things before you can even remove the part itself. Start by removing the exhaust manifold. Loosen the bolts holding it to the head with your wrench, and pull it away. Then, you’ll need to disconnect the distributor from the intake manifold. There will be spark plug wires attached to it, so pull these out of place before you undo the nut holding the distributor on top of the intake manifold. Another set of spark plug wires will need to be disconnected before you can unbolt both the valve corners and the intake manifold itself.
3.Remove Pushing Rod & Rocker Arms
The rocker arms and pushrods are your last obstacle before you get to take care of the head itself. Fortunately, all you need to do is remove the single nut on top of each rocker arm in order to pull it away; there will be one rocker arm and pushrod per valve. Once the rocker arms are lifted away, you can pull the pushrods up through the head. There’s a procedure for removing the cylinder head’s retaining bolts, beginning with the bolts on the outside. When this is finally off, you’ll need to start cleaning the top of each cylinder. Make sure that there is no grease or dirt present so you’ll be prepared to replace the cylinder head when you’re finished.
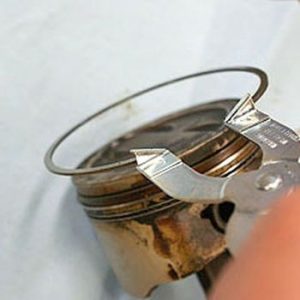
4.Cleaning & Remove Piston
Before you can replace the piston rings, it’s important to fully clean the piston. Cover all the cylinder holes to prevent debris from the piston from falling inside. Then, simply scrape off the dirt until enough is removed that you can pull out the piston. Before you can change the piston rings, you’ll need to remove each of the cylinders. This will vary from make to make, so you’ll need to consult your service manual. When you’ve removed the cylinders, they will also need to be cleaned. Do this by soaking them in kerosene before allowing them to dry completely. Do this in a well-ventilated area. You’ll need to use your piston ring tool to remove the old piston rings. Before replacing them, check each of the ring grooves on the piston for wear by using a feeler gauge to see if they still meet the proper specifications. If the grooves have worn too much, replacing the piston rings won’t be enough; you’ll need a complete new piston. If the rings don’t want to move, you can loosen them by soaking them overnight in diesel oil.
5.Install New Piston
When you’re ready to put on the replacements, you need to stretch them with your piston ring tool as you fit them over the piston. However, you need to be very careful that you don’t stretch them so much that they break (if they do, new piston rings are very cheap). Make sure that the piston rings are secure in the ring grooves. When you’ve done that, inspect the piston once more before replacing it along with the connecting rods. Reverse the process you used to remove them. Then, before replacing the cylinder head, check the head gasket. In most instances, you should replace it while working on the piston rings. Finally, put on the cylinder head and reattach all the other items to the engine block to finish.


$58.99


Got something to discuss?