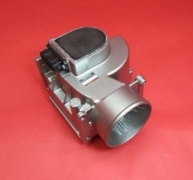
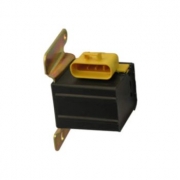
F85B-14B194-CA | 1998-2003 Ford F150 4×4 4WD Transfer Case Relay Computer Module
Price list
Still could not find the Part? Contact us @ Find Exact Part in 24 Hours
Specification
| Brand | |
|---|---|
| Year | 1998, 1999, 2000, 2001, 2002, 2003 |
| Make | |
| Model | F150 |
| Trim | 2-door Standard-cab pickup, 2+1-door Extended-cab pickup, 2+2-door Extended-cab pickup, 4 door Super-crew, 4-door Crew-cab pickup |
| Engine | 4.2 L Essex V6, 4.6 L Triton V8, 5.4 L Triton V8 |
| Placement on Vehicle | Front-Left |
| Fitment Type | Direct Replacement |
| Warranty | Yes |
| Part Number | F85B-14B194-CA |
| Condition | Used |
Fit In Five Steps
How to replace a Ford F150 Transfer Case Relay Module Control Unit?
1.Secure Yourself
Open the engine compartment to access the battery. Disconnect the battery with a socket wrench.
2.Locate Transfer Case Control Module
Locate the ECM either in the engine compartment or under one of the front seats in the vehicle. The ECM is a silver, rectangular module. Consult your owner’s manual or appropriate car dealership for the location of the ECM if you don’t know.
3.Remove Old Body Control Module
Disconnect the electrical supply by lifting the locking tab and pulling away from the computer. This will isolate the electrical power. Unbolt the screws holding the ECM in place with a socket wrench. Pull the old ECM out.
4.Replace New Transfer Case Control Module
Replace it with the new one. Bolt the ECM in place with the socket wrench. Ensure the bolts are tight. Plug in the electrical wires to the ECM. The wiring harness will lock in once it is pushed in far enough.
5.Replace all Removed Parts and Check Engine
Connect the battery cables to the battery. Tighten the cables with a socket wrench. Start the vehicle and allow it to idle for five minutes. If there are still conflicting codes, the “Check Engine” light will come on.

$31.99


Got something to discuss?