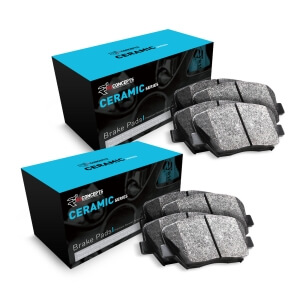
SPK505558065-4WD | 2005-2010 Hyundai Tucson and Kia Sportage Front & Rear Ceramic Brake Pad Set
Price list
Still could not find the Part? Contact us @ Find Exact Part in 24 Hours
Specification
| Brand | |
|---|---|
| Year | 2005, 2006, 2007, 2008, 2009, 2010 |
| Make | |
| Model | Sportage, Tucson |
| Trim | Sport Utility 4-Door |
| Engine | 2.0L 1975CC l4 GAS DOHC Naturally Aspirated, 2.7L 2656CC V6 GAS DOHC Naturally Aspirated |
| Placement on Vehicle | Front, Rear |
| Fitment Type | Direct Replacement |
| Surface Finish | Ceramic Low Dust |
| Warranty | 1 Year |
| Part Number | HB96448, SPK505558065-4WD |
| Condition | New |
Fit In Five Steps
How to replace a Hyundai Tucson and Kia Sportage Front & Rear Brake Pads?
1.Get Your Car Off the Ground
You’ll need to remove your tires in order to get to your brake pads. If you’ve ever changed a flat tire, the first part of this process should be familiar. Start by using your tire iron to loosen the lug nuts on the wheels where you’re replacing the brake pads (typically you should be doing this in pairs, so either both front tires or both back tires). You’ll need to loosen the lug nuts before you lift the car because otherwise, your wheels will just spin in the air.
Once the lug nuts are loose, it’s time to jack up your car. Your owner’s manual should tell you where it is safe to place a jack underneath your car. Some cars have a jack point specifically for floor jacks, while others will simply use the jack points on the side of your vehicle that you would use to change a flat tire. Once you’ve located your jack point, lift your car with the jack (if you’ve never used a floor jack before, check out this guide over on Jalopnik on how to use one). Next, place the jack stands underneath a solid, structural piece of the vehicle’s frame. Once again, your manual can give you specifics. When the stands are in place, slowly lower your vehicle until it is safely resting on the jack stands, then remove your floor jack. Now, you can finish unscrewing the lug nuts and remove the tire from your car.
2.Remove the Caliper Assembly and Old Brake Pads
At this point, you should see your rotor and brake caliper assembly. The caliper assembly acts as a clamp, squeezing your brake pads against your rotors, which slows your wheels down so you don’t careen into walls. Using a socket wrench, remove the bolts on the back of the caliper assembly. Now slide the caliper assembly off of the rotor. Note that the assembly will still be attached to the brake line. Do not hang the caliper by the brake line. Gently set the caliper on top of the rotor, or use a piece of wire to hang it from the wheel well.
Make sure it is completely supported and won’t fall before moving on. If the caliper drops, it could snap the brake line, which will be much more expensive to fix. At this point, you can remove the brake pads from the rotor. Depending on your car, these may either slide or pop out. Be careful not to damage any of the clips, or the rotor itself, especially if you plan to continue using the same rotor. If your brake pads came with extra clips, you may also want to remove the old clips and replace them with the new ones. As you remove the pads, keep track of how they are oriented in the brake assembly to make it easier to insert them correctly in the next step.
3.Replace the Brake Pads
Now that the old brake pads have been removed, you can put in the new ones. First, apply the brake grease to the backs of the pads. When you press your brakes, the caliper piston will press against the backs of your brake pads, which can cause an annoying squeaking sound. This brake grease helps reduce that noise. Be careful not to get grease on the front of the brake pads or the rotors. Your brakes depend on friction between the pads and rotors to slow your vehicle. Getting grease in between these two parts defeats that purpose and can potentially harm you or your vehicle.
Once you’ve applied the brake grease, place the new brake pads in the same spot that you removed the old pads. If you’re doing this for the first time, try replacing one brake pad at a time so you can see exactly where each part goes before moving on to the next one.
4.Replace the Brake Caliper Assembly
Once your new brake pads are in place, you’ll need to replace your caliper assembly. You might notice that the assembly no longer fits on top of your brake pads. This is because as your brake pads wear down, the piston inside the caliper assembly will adjust to their smaller width. You’ll need to use your brake tool to fix this.
First, place one of your used brake pads inside the caliper assembly against the large circular piston. Then, place the wide plastic piece of the brake tool against the opposite side of the caliper. Rotate the handle on the brake tool to compress the piston back into the caliper assembly until it is fully retracted. You may also need to compress the pins where your caliper assembly bolts screw into. Once that’s done, you can place the caliper assembly onto your brake pads. Insert the assembly bolts and tighten them down with your socket wrench.
5.Replace Your Tires and Wrap it up
Double-check to make sure that everything is tight and sealed securely before you replace your tire. Once you’re ready, place your tire back on your rotor and hand tighten the lug nuts to keep the tire in place. Place your jack underneath your car on the jack points and lift the vehicle off of the jack stands. Remove the jack stands from underneath your vehicle, then slowly lower the vehicle back down to the ground.
Once the car is on the ground, you can use your car’s tire iron to securely tighten the lug nuts. Take extra care during this step to make sure that the lug nuts are snug, without stripping them. If you have a torque wrench, use it to make sure your lug nuts are tightened appropriately. You don’t want your tires to start wobbling or fall off once you hit the road again.


$50.07


Got something to discuss?