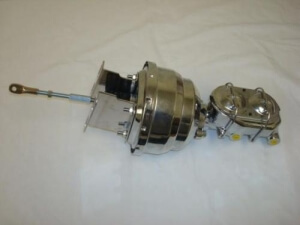
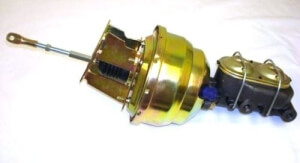
1957-1959 Ford Mercury Car Chrome 8″ Dual Power Brake Booster+Master Cylinder
Price list
Still could not find the Part? Contact us @ Find Exact Part in 24 Hours
Specification
| Brand | |
|---|---|
| Year | 1957, 1958, 1959 |
| Make | |
| Model | Club, Consul , Country Sedan, Country Squire, Fairlane, Ranch Wagon, Ranchero, Skyliner, Squire, Thunderbird |
| Trim | 500, Base, Convertible 2-Door, Hardtop 2-Door, MK II, Sedan 4-Door |
| Engine | 1.7L 1703CC 104Cu. In. l4 GAS Naturally Aspirated, 3.6L 3655CC 223Cu. In. l6 GAS OHV Naturally Aspirated, 3.7L 223Cu. In. l6 GAS Naturally Aspirated, 4.8L 4786CC 292Cu. In. V8 GAS OHV Naturally Aspirated, 5.1L 5114CC 312Cu. In. V8 GAS OHV Naturally Aspirated, 5.4L 5441CC 332Cu. In. V8 GAS OHV Naturally Aspirated, 5.8L 5769CC 352Cu. In. V8 GAS OHV Naturally Aspirated, 7.0L 7048CC 430Cu. In. V8 GAS OHV Naturally Aspirated |
| Placement on Vehicle | Front |
| Fitment Type | Direct Replacement |
| Material | Steel |
| Color/ Finish | Chrome, Zinc |
| Size | 8"dual |
| Warranty | Yes |
| Part Number | 7801c; 8"dual chrome; 3510-2c; rod + eyelet, 7801z; 8"dual zinc; MC; rod + eyelet |
| Condition | New |
Fit In Five Steps
How to replace a Ford Mercury Brake Booster Master Cylinder?
1.Clean Up Before You Start
Before you start wrenching on your braking system, you need to thoroughly clean all of the parts involved. The inside of a brake system is very sensitive to dirt and debris. Even the smallest piece can cause wear and malfunction. Spray the master cylinder, brake lines, and other components liberally with brake cleaner. Let it soak and do it again. If it’s extra gooey in there, you might need to steal your kid’s toothbrush to take care of it. No matter how you do it, be sure the area is clean before you even remove the brake fluid cap. Once you’ve got everything spic-n-span, remove the fluid reservoir cap and suck the old brake fluid out with your turkey baster. Don’t worry about getting every drop; you’re just making the next steps a little cleaner.
2.Loosen the Brake Lines
If your car has a “low brake fluid” sensor in the fluid reservoir cap or any other wiring (such as ABS) on the master cylinder, unplug them. Now take your line wrench and loosen all four brake lines at the master cylinder, but don’t unscrew them all the way yet! You want to leave them in there just a little bit. You’ll see why in the next steps.
3.Unbolt the Master Cylinder
With the brake lines loosened but not removed, you can remove the bolts that hold the master cylinder in place. It’s usually bolted to a brake booster of some shape or size, but you can look at your new master cylinder to see exactly what you should be removing. With the master cylinder bolts removed, you can lift the master cylinder up slightly (if needed) and remove the four brake lines. We left them screwed in slightly because often you aren’t able to pull them all the way out because of shock tower clearance. It’s not fun having to rethread all the brake lines so that you can get them out enough to remove.
4.Retrieve the Rear Master Cylinder Seal
With the master cylinder removed you’ll be able to see the rod that pushes the piston in the master cylinder. If it didn’t come off with the master cylinder, there will also be a seal around the pushrod. Remove this seal. If your master cylinder came with a new seal, you’d be replacing it. If not, clean it up for reuse. It still needs to come out temporarily.
5.Reinstall and Wrapping Up
Now that you’ve removed the old master cylinder, you’re ready to install the new part. But before you do, it’s a good idea to bench bleed the master cylinder. It’s much easier to get the air out now than later. It goes in just like it came out, so in the words of service manuals around the world, “installation is the reverse of removal.”Once the new part is installed, you’ll need to add new brake fluid (never try to reuse the old stuff) and bleed the brakes. Now you’re ready to go!


$159.97


Got something to discuss?