
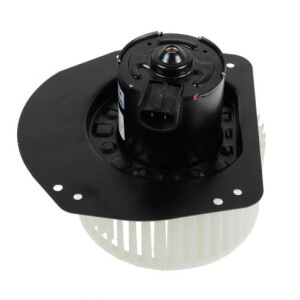
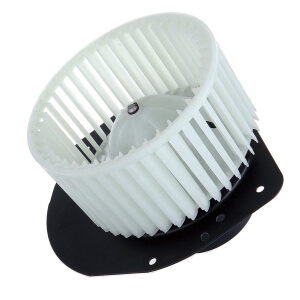
1979-2011 Ford Mercury Lincoln A/C Heater Blower Fan Motor Cage Assembly
Price list
Still could not find the Part? Contact us @ Find Exact Part in 24 Hours
Specification
| Brand | |
|---|---|
| MPN | 1W7Z 19805 BA, 615-00463, A05839601M2020, EOTZ 19834 A |
| Year | 1979, 1980, 1981, 1982, 1983, 1984, 1985, 1986, 1987, 1988, 1989, 1990, 1991, 1992, 1993, 1994, 1995, 1996, 1997, 1998, 1999, 2000, 2001, 2002, 2003, 2004, 2005, 2006, 2007, 2008, 2009, 2010, 2011 |
| Make | |
| Model | Bronco, Crown Victoria, F-100, F-150, F-250, F-350, Grand Marquis, LTD, Marauder, Mark VI, Town Car |
| Trim | All |
| Engine | All |
| Placement on Vehicle | Front |
| Fitment Type | Direct Replacement |
| Material | Plastic |
| Shaft/Speed Type | Single Shaft/Speed |
| Color | White, Black |
| Warranty | Lifetime |
| Part Number | 058396-5211-1654372603, 1AHCX00056, 1W7Z 19805 BA, 615-00463, A05839601M2020, AM-31740723, EOTZ 19834 A, MM-929, TO3126102 8710302050, TYC 700014 |
| Condition | New |
Fit In Five Steps
How to replace a Ford Mercury Lincoln A/C Heater Blower Fan Motor Cage Assembly?
1.Accessing the Blower Motor
Start by checking under the hood and looking around the passenger’s side for something that looks like this: If you cannot find the blower motor under the hood it will be located under the dash on the passenger side. You may need to remove the mounting screws of the lower panel to gain access to the motor for removal. This heater motor location is under the dash. Let’s start the removal which is the same for under hood or dash applications.
2.Remove the HVAC A/C Heater Blower Fan Motor Cage Assembly
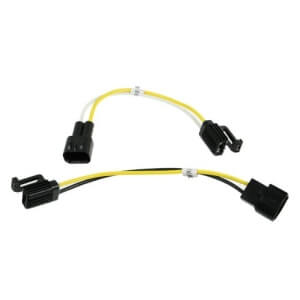
Locate and disconnect the a/c blower motor wiring by releasing the safety tab on the side of the connector. This connector can have one or four wires depending if the system is manually or automatically controlled. These different systems will vary the fan speed by using a solid state speed controller as opposed to a basic resistor.
Once the electrical connector is removed check its condition while looking for corrosion or burned terminals which are a sign of high resistance or increased amperage draw. If the connector is melted it must be replaced by splicing in a new part which you can get from the dealer, auto parts store or Amazon. Opposed to a crimp connector, it’s best to more solid these wires together to cut down on resistance which helps the motor last longer.
3.Removal Bolts & Screws
Identify the heater motor and the mounting screws holding it into the heater box. These screws are mounted in the plastic housing and are not too terribly tight so they can be removed easily. Some of these screws can be hidden under metal braces, plastic tabs or wiring so use a small mirror if needed. Start by removing the mounting screws one at a time. The motor will then start to fall out of the heater box.
While holding the blower motor in place remove the last screw. After all of the screws have been undone grasp the motor and remove it from the housing. This can take some maneuvering so hang in there and be careful not to damage the fan blade (squirrel cage) against the heater plenum.
4.Install the New HVAC A/C Heater Blower Fan Motor Cage Assembly
Once the old motor has been removed compare it to the new unit. In some cases, an electronic speed controller is used in climate controlled systems and will need to be transferred to the new motor but this is not typical. On some replacement units, you will need to transfer the old fan blade over to the new assembly. This is done by removing the mounting nut or clip and then forcing the blade off of the motor shaft using a large standard screwdriver. Do not use oil or lube of any kind to help installation of the fan onto the replacement motor because it will allow the fan to slip on the shaft which will create problems.
Before installing the new motor into the plenum check for obvious obstructions such as leaves, sticks, ink pens, toothpicks or small toys which can get into the system via the inlet or outlet vents. These foreign partials can keep the motor from working freely and could cause premature failure. When the new assembly is ready to be installed fit the motor by maneuvering and rotating it gently. Then push it back into the plenum while lining up the mounting holes.
5.Reinstall and Checking Blower Motor
While the motor is in place start to install the mounting screws while holding it toward the plenum. Do not tighten any of the screws until all screws have been threaded in by hand. This will make the installation go much easier without the potential of stripping the screws out. Tighten each screw in a cross pattern, do not over tighten. This will ensure the proper alignment of the fan blade in the housing. If this step is not done properly it can cause the blade to contact the housing creating a rubbing or clicking noise when the motor is operating.
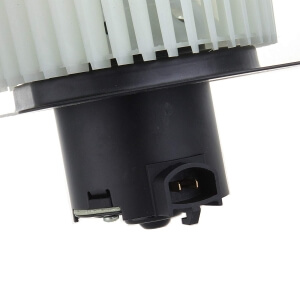
Check the wiring connector locating tang which indicates the orientation of the connector before it’s installed into the motor. This tang is to ensure you don’t install the connector incorrectly which would cause electrical problems. Then carefully re-insert the blower fan motor electrical connector by securing it into position. You should hear an audible click telling you the connector is installed correctly. Gently tug on the wiring to ensure its correct installation.
Then reinstall the lower dash cover and install the mounting screws by hand. Tighten them snuggly, do not over tighten, again these screws are going into plastic. Finally start the engine up and turn the climate control on and listen for the fan to come on. It should sound smooth and be blowing from the vents in a strong flow. If you hear a rattle, squeak or ticking turn the system off and remove the blower motor to recheck the installation.


$37.68


Got something to discuss?