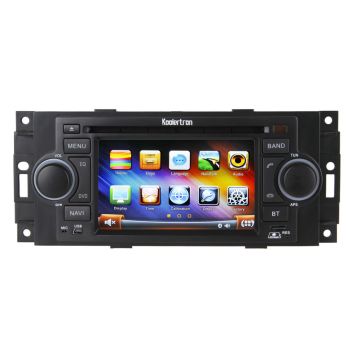
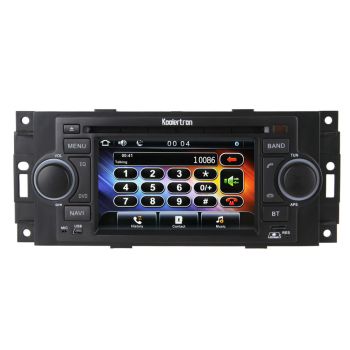
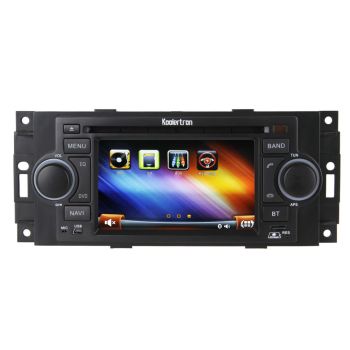
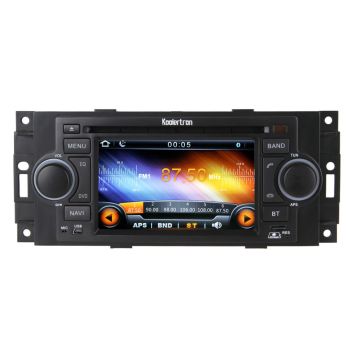
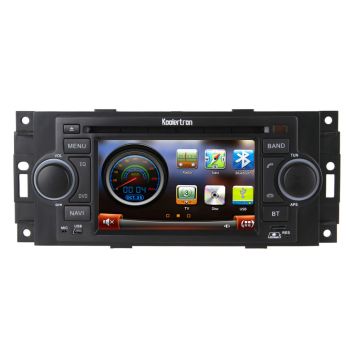
2002-2008 Jeep Cherokee Commander Compass Patriot US Auto Stereo GPS Satnav DVD Radio
Price list
Still could not find the Part? Contact us @ Find Exact Part in 24 Hours
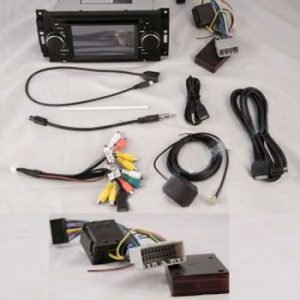
Specification
| Brand | |
|---|---|
| MPN | WA-D8833C1 |
| Year | 2002, 2003, 2004, 2005, 2006, 2007, 2008 |
| Make | |
| Model | Cherokee, Commander, Compass, Patriot |
| Operating System | windows ce 6 |
| Color | Black |
| Binding | Electronics |
| Product Group | GPS or Navigation System |
| Touchscreen | 5.0" Digital High Definition 800*480 |
| Color of button light | Green |
| Capacity | 1 Micro SD slot, support Max. 8G, 1 mini USB port |
| Item Dimensions | Height: 394, Length: 394, Weight: 882, Width: 787 |
| Package Dimensions | Height: 394, Length: 984, Weight: 1323, Width: 591 |
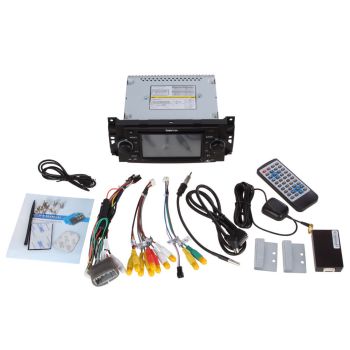
| Package Quantity | 1 |
| Part Number | QL-JEP801, WA-D8833C1 |
| Condition | New |
Fit In Five Steps
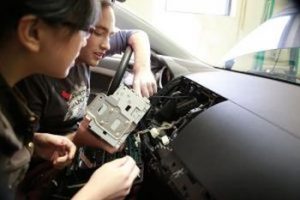
How to replace a Jeep Cherokee Commander Compass Patriot GPS Satnav DVD Radio?
1.Disconnect the Car’s Negative Battery Terminal
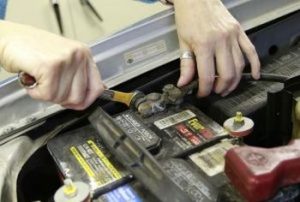
First, installers should disconnect the negative cable from the car ‘ s battery and put the parking brake on. Next, they will remove the old stereo. It is a good idea to note the mounting method and steps involved, as these steps will be repeated later, in reverse, upon the installation of the new unit.
2.Disassemble the Dash

Car audio systems are connected via one of two means, spring clip mounting or bolts. A pair of DIN tools, so named because of their inventor, will be necessary to remove a stereo held in place by spring clip mounting. If the factory stereo has been bolted in place, generally by a set of four screws, the plastic trim may first need to be pried away from the dash before the bolts are revealed. The unit should also be unplugged from the car’s electrical system; this may include both a wiring harness and an antenna.

3.Connect the Wiring Harness
Once the old unit is out, it is time to connect the new unit’s wiring. Often, manufacturers will provide custom wiring harnesses, simplifying and speeding this process. If this is not the case, each existing stereo wire will need to be matched with its corresponding new stereo wire. (The Internet is a great place to find an illustration or video of this process.) Once the wires are matched, they will need to be connected either by crimping (easiest and fastest) or soldering (more permanent and professional). For best results, it is recommended that a heat gun and heat-shrink tubing be utilized to ensure the maximum transfer of current.
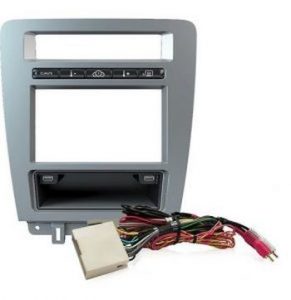
4.Mounting Kit
Installing the new stereo is easily accomplished through the use of a mounting kit. An individual will need to install this first before inserting the new stereo’s metal mounting sleeve. The stereo wiring adapter should be joined to the wiring harness, and the antenna cable plugged in. Before fastening the unit, the installer should test it first to ensure proper operation. Systems to be tested include the power; AM, FM, CD, auxiliary sources, and the balance and fader.
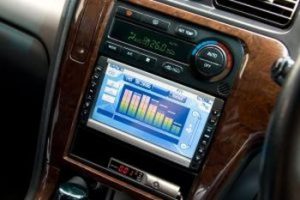
5.Securing the New Unit
Assuming the audio system is working correctly, it is now the time to secure it into the dash. Any trim removed from the factory unit should be replaced at this time. A backstrap provides additional in-dash stereo support. Although it is generally not required, an individual may opt to install one to reduce vibration and reinforce the unit. Connect and install the new stereo. Reassemble all removed parts for the dashboard. Reconnect the battery and start to drive test the system.


$299.99


Got something to discuss?