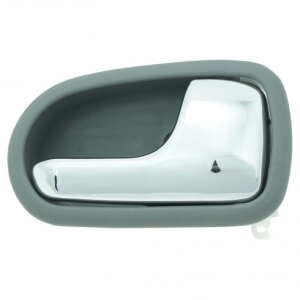
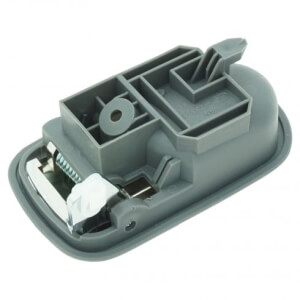
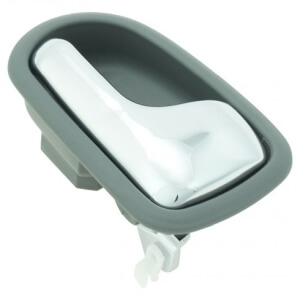
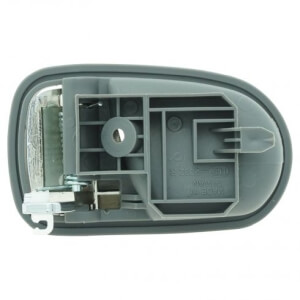

1995-2003 Mazda Protege Front or Rear-Right Chrome & Gray Interior Door Handle
Price list
Still could not find the Part? Contact us @ Find Exact Part in 24 Hours
Specification
| Brand | |
|---|---|
| Year | 1995, 1996, 1997, 1998, 1999, 2000, 2001, 2002, 2003 |
| Make | |
| Model | Protege |
| Trim | DX Sedan 4-Door, ES Sedan 4-Door, LX Sedan 4-Door, Mazdaspeed Sedan 4-door, MP3 Sedan 4-Door, S Sedan 4-door, SE Sedan 4-Door |
| Engine | 1.5L 1489CC l4 GAS DOHC Naturally Aspirated, 1.6L 1589CC l4 GAS DOHC Naturally Aspirated, 1.8L 1839CC l4 GAS DOHC Naturally Aspirated, 1.8L 1839CC l4 GAS Naturally Aspirated, 2.0L 2000CC l4 GAS DOHC Naturally Aspirated |
| Placement on Vehicle | Front, Rear-Right |
| Fitment Type | Direct Replacement |
| Material | Plastic |
| Surface Finish | Grey & Chrome Plated |
| Warranty | Lifetime |
| Part Number | 1ADHI00293, AM-37987681 |
| Condition | New |
Fit In Five Steps
How to replace a Mazda Protege Front or Rear-Right Chrome & Gray Interior Door Handle?
1.Materials Needed for Repair
- Painter’s tape
- Phillips screwdriver
- Replacement door handle
- Socket wrench set (1/4 drive)
- Torx bit set
It’s a good idea to have the replacement door handle in your hands before starting to dismantle anything. This makes it possible to study the handle and gain a little insight into how it’s attached. There may be fasteners on one or both ends. If your car has automatic door locks, there may be little levers that have to be connected or even electrical connections if the car is equipped with a security system. By looking at how the fasteners are installed, you can determine if they can be removed from the exterior of the door, or if it’s necessary to work from the inside of the door. If it has to be worked from the inside, that goes beyond the scope of this article.
2.Locate the Fasteners & Apply Painter’s Tape
In most cases, there is a fastener located in the door jamb just around the corner from the door handle. Sometimes it’s out there in plain view, often it’s hidden behind a plastic plug or a piece of weatherstrip but it’s usually not hard to find. In many cases, it will be the only fastener in use; in others, there might be a screw at the forward end. You can tell by looking at the replacement handle. Before you go any further, it’s time to put a little painter’s tape around the door handle. This will help you do the job without scratching the paint. Use a good quality tape – one that can be removed easily to protect the finish. Now it’s time to break out your, screwdriver, socket set, or Torx driver to take out the bolt(s). Once removed, the handle can be moved fore and aft.
3.Remove the Door Handle & Switching the Lock Cylinder
Slide the door handle toward the front of the car, then the rear of the handle can be tilted out of the door. When this is done, the front of the handle will be free to move and can also be slid out of the door in a similar fashion. Any mechanisms that have to be disconnected will be apparent at this point. There may be a small pair of wires for the alarm or a plastic rod attached to an automatic door lock. In most cases, these can just be popped off with the fingers. If you’ve decided to switch out your old lock cylinder, this is the time to do it. Put the key in the lock and unclip the fastener at the end that holds it in place. There may be a clock spring and other devices attached. Carefully withdraw the cylinder with the key in place and replace it in the new handle.
4.Install the Door Handle
Make sure any rubber gaskets are in place and slide the small end (front) of the door handle into the slot first then start to insert the large end. Reconnect any links or electrical connections and guide the handle into the slot. Looking into the hole, you should be able to see whatever mechanism the handle has to engage, it may be necessary to operate the lock or the trigger to get the latch to engage the mechanism while you insert the handle.
5.Reinstall the fasteners & Check
Put the fastener on the door jamb first but do not tighten it yet, Check and make sure the handle is seated well against the door. If there is a fastener on the front, install it now, but don’t tighten it yet. Tighten the fastener at the door jamb first, then you can tighten any other fasteners. Try out the door handle, test the lock, and check the alarm to be sure you have everything hooked up correctly. Once you’re sure the job is done, be sure to put back the plastic plugs that covered up the holes.


$9.52


Got something to discuss?